
I don’t know about you, but I’ve tried just about every pipe smoking tip ever offered to me – and that’s a lot of tips since I’ve been puffing on my briars for over 50-years. Some tips that I tried were so off the wall bad that I’m too embarrassed to even tell you about the ones in that category that I was suckered into trying. I will, however, share some with you that I consider to be “tip worthy,” and use myself either all the time, frequently, or sometimes. And by the way, those of you who are members of my First Responders email group will find some of these tips to be familiar since I have shared some of them in my weekly Pipestud’s Consignment Shop Newsletters over the years. These tips are offered in no particular order of importance to me. I just numbered them so that I would know to stop typing after I completed tip No. 10.
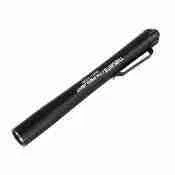 Tip #1 – Did you know that it is easy to tell the difference between a vulcanite and acrylic stem? There are, in fact, two sure fire ways to do it, even if both stems look shiny black. Take a bright penlight and put it right up to the acrylic stem. You will note that as you run the penlight up and down the length of the stem, the color is a uniform slate gray. Now, do the same thing with a vulcanite stem. You will immediately note that the color of the vulcanite stem looks brownish under the bright light. And, depending on the sulphur content, the color may vary a little as you move the light up and down the stem. Another easy way to tell the difference between vulcanite and acrylic stems is what I call, “the smell test.” First, grip the vulcanite stem firmly in one hand and then place the thumb on your other hand firmly down on the top of the stem and rub back and forth vigorously for about ten seconds. Then, put the rubbed part of the stem up to your nose and take a whiff. You will immediately note a burnt rubber smell. When you do the same thing with an acrylic stem, there will be no smell at all.
 Tip #2 – One tip that was taught to me many years ago that added to my smoking enjoyment as much as any other tip that I’ve ever received was learning to dry out tobacco that was too moist. Different blends dry out at different speeds, so there is a learning curve. But, when you think you’ve dried out your tobacco just a little too much, that is when it is probably just right. Moisture produces flavor robbing steam to the smoke and steam is a lot hotter than the actual smoke, too. So, the more dry the tobacco the less heat on the tongue. When you pinch a wad of tobacco between your thumb and finger, if it springs back quickly then you have just the right moisture level. If it stays stuck together then dry it some more.
 Tip #3 – In a year 1996 issue of Pipes & Tobaccos Magazine, there was a story on famous American pipe maker Michael Butera. In the article, Butera said he used a one speed food processor to chop up all of his tobacco as it aided in mixing all the components evenly which made packing easier and presented a more even burn for a cooler smoke. It also enables the smoker to relight less frequently since there were fewer gaps between tobacco and air. So, I purchased one of those gizmo’s and was an immediate believer. Just make sure that you purchase a one speed food processor and not a mixer that has a much higher resolution speed or all you’ll get is tobacco puree’. * Please Note – Make sure the food processor is your own. Before mine arrived I was eager to start the process and snuck the blender that my wife used to make her morning orange juice/banana drink. Due to the high resolution speed of the blender, my tobacco was almost soup. I thought I had cleaned the mess up pretty well, but she was none too pleased the next morning when, while drinking her concoction, she found shards of Latakia mixed in with her drink. I’m not sure that I’m out of the doghouse yet for that one!
![]() Tip #4 – Keep your pipes clean! I can’t count the times that I have had consignors send me pipes to sell who say the pipe or pipes they were sending just don’t smoke as good as they used to. And, 9 times out of 10 those pipes arrive looking nice on the outside and the tobacco chamber is nicely reamed, BUT, when I run an EverClear soaked pipe cleaner through them to check for internal cleanliness, I often find out that the pipe is absolutely filthy on the inside with a nasty build up of gooey tars and even cake that has nearly clogged up the air hole entrance to the tobacco chamber. Not only is the draw restricted, but all that build-up of nastiness destroys the true flavor of what you are smoking. Most of those “pipe sweeteners” that you purchase online are junk. They have little alcohol content and only cover the sour taste of a dirty pipe for a bowl or two. It’s best to use the highest proof alcohol you can get your hands on and most of the professional pipe refurbishers suggest 190 Proof EverClear (some states only allow 150 proof), and either one is outstanding. After every 10-20 bowls of tobacco you smoke, just run EverClear soaked cleaners through the stem down to the chamber opening until they come back clean. Then twist a paper towel down into the bowl to dry and clean it. I also take my pipe apart and use an EverCear soaked Q-tip to clean the mortise. 24 hours later, grab that clean pipe and commence to smoking again!
Tip #4 – Keep your pipes clean! I can’t count the times that I have had consignors send me pipes to sell who say the pipe or pipes they were sending just don’t smoke as good as they used to. And, 9 times out of 10 those pipes arrive looking nice on the outside and the tobacco chamber is nicely reamed, BUT, when I run an EverClear soaked pipe cleaner through them to check for internal cleanliness, I often find out that the pipe is absolutely filthy on the inside with a nasty build up of gooey tars and even cake that has nearly clogged up the air hole entrance to the tobacco chamber. Not only is the draw restricted, but all that build-up of nastiness destroys the true flavor of what you are smoking. Most of those “pipe sweeteners” that you purchase online are junk. They have little alcohol content and only cover the sour taste of a dirty pipe for a bowl or two. It’s best to use the highest proof alcohol you can get your hands on and most of the professional pipe refurbishers suggest 190 Proof EverClear (some states only allow 150 proof), and either one is outstanding. After every 10-20 bowls of tobacco you smoke, just run EverClear soaked cleaners through the stem down to the chamber opening until they come back clean. Then twist a paper towel down into the bowl to dry and clean it. I also take my pipe apart and use an EverCear soaked Q-tip to clean the mortise. 24 hours later, grab that clean pipe and commence to smoking again!
 Tip #5 – I learned this trick many years ago regarding the easiest and most simple way to re-hydrate dry tobacco. Simply load your pipe with the tobacco, then take a deep breath and put your mouth over the top of the bowl and slowly exhale down into the bowl as your breath moves down through the leaf and then up the shank and out the stem. You will be absolutely shocked and amazed. Your bowl of tobacco will be perfectly re-hydrated. It is best to practice this first on your wife or girlfriend.
 Tip #6 – Layering your tobacco can produce really fun results! Here is a quick example of what I like to call a “Parfait smoke” – I recently decided to try a new style of Virginia/Perique smoking experience. I have a Jerry Crawford pipe that seems to smoke VaPer’s very well. It is a straight billiard tanblast with a medium sized, thick bowl. I loaded the first two thirds of the bowl with some old McCranie’s ’96 Vintage Crop Red Ribbon and then topped it off with the final third of the bowl being some old year 1994 McClelland’s Blending Perique. Once lit, the straight Perique traveled down the bowl through the Red Virginia which softened the Perique’s flavor and actually gave off a little flavor of its own as the Virginia leaf began to “sweat” a bit from the heat above. The rich bottom notes of the Virginia became more pronounced as the fire began consuming it, yet the Perique presentation remained noticeable throughout the remainder of the smoke even though the Perique itself had been totally consumed. A really fun smoking experience!
 Tip #7 – Flake Fun! For long lasting cool smokes, try tightly rolling your flakes and stuffing them down into the bowl of your pipe. Take a small portion of the flake and fully rub it out and put it at the top of the bowl to help get the fire going when you light up. You will discover that while you’ll probably need a lot more relights than with a ribbon or shag cut tobacco, the smoke will be cooler due to all the free flowing air down in the bowl that will join the smoke as it travels up the shank and stem into your mouth. There is a downside; the depth of the flavor of the tobacco that you smoke will not be as pronounced as it would have been had you fully rubbed out the flake and put it into your pipe that way. Such a presentation gets more of the flavorful smoke and less air into your mouth as you puff. So, if you prefer a lighter tasting blend, don’t rub out the flakes and if you prefer a stronger tasting blend, rub out to your heart’s content.
 Tip #8 – How to properly tamp your pipe? Well, there are more ways to tamp your tobacco as you smoke than one might think. I recently learned of a trick that has worked wonderfully for me. Thanks to well known pipe maker and pipe repair man Tim West for this one. As you smoke, tamp down directly into the center of your bowl. This pushes down the burnt leaf and causes the unburned tobacco around the inner edges of the tobacco chamber to “cave in” to the center so that with your second tamp, you are forcing the unburned leaf to evenly cover the center so that when you relight, it gets the flame’s heat first so that you are consuming all of your tobacco, and most importantly, helps keep the pipe lit as you continue puffing.
 Tip #9 – I strongly agree with the thought that specific blend types should always be smoked in a pipe that has been reserved exclusively for those types of blends. If you smoke Latakia in a particular pipe and then smoke a straight Virginia in the same pipe the very next bowl, you will taste the remnants of the Latakia no matter how well you clean the pipe before making the switch. To get the true taste of the Virginia blend you are smoking, make sure you smoke that blend only in your pipes that are dedicated to Virginia tobaccos and vice versa. Perique and aromatic blends also leave heavy “ghosting,” and should be treated in the same manner. Burley and Orientals don’t really do much ghosting, but still, try to keep the blend types separate in order to get the truest taste from each blend that you smoke.
Tip #10 – Puff as slowly as possible. When you “sip” rather than puff like a runaway freight train, two things occur and both of them are good. Number one, the slower the cadence the cooler the smoke and less heat means more flavor. Number two, you have less chance of getting a case of nasty old tongue bite!